Project Summary Tab
FlexNet Code Insight 2020 R2
The Summary tab for the project allows you to add and edit users who can work in FlexNet Code Insight, view scan settings and status, generate reports, and manage projects. The page contains the following fields:
|
Category |
Column/Field |
Description |
||||||||||||
|
Project Details |
These field describe the project attributes. You can edit these details using the Manage Project | Edit Project and Manage Project | Edit Project Users options available on this Summary tab |
|||||||||||||
|
Name |
The name given to the selected project and its Id number. |
|||||||||||||
|
Owner |
The hyperlinked name of the person who owns the project. Click the name to open your default email program to send an email to the Project Owner. |
|||||||||||||
|
|
Legal Contact |
The hyperlinked name of the default legal contact assigned to tasks created to review legal issues in the project inventory. Click the name to open your default email program to send an email to the contact. For details on changing the default legal contact, see Updating Inventory Review and Remediation Settings for a Project. If no changes are made to the initial default contact (the Project Owner) or if the automated legal-review process is disabled, this value shows the Project Owner name. |
||||||||||||
|
Security Contact |
The hyperlinked name of the default security contact assigned to tasks created to review security issues in the project inventory. Click the name to open your default email program to send an email to the contact. For details on changing the default security contact, see Updating Inventory Review and Remediation Settings for a Project. If no changes are made to the initial default contact (the Project Owner) or if the automated security-review process is disabled, this value shows the Project Owner name. |
|||||||||||||
|
Developer Contact |
The hyperlinked name of the default development contact assigned to remediation tasks created to take action on code-related issues in the project inventory. Click the name to open your default email program to send an email to the contact. Tor details on changing the default development contact, see Updating Inventory Review and Remediation Settings for a Project. If no changes are made to the initial default contact (the Project Owner) or if the automated remediation process is disabled, this value shows the Project Owner name. |
|||||||||||||
|
Description |
A description of the project, if provided in the project definition, appears in this field. |
|||||||||||||
|
Project Type |
The type of project:
|
|||||||||||||
|
Project Visibility |
The visibility of the project:
|
|||||||||||||
|
|
Project Risk |
The project vulnerability risk value (Low, Medium, or High). |
||||||||||||
|
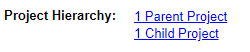
Project Hierarchy |
Links to the projects that have been defined as parent and child projects of the current project. These links provide a means to easily navigate to projects directly related to the current project. (Relationships between projects are established by the creation of project hierarchies, as described in Identifying Child Projects for a Project.)
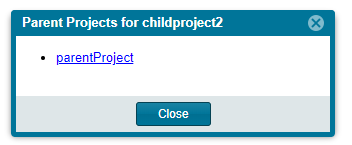
When you click a Project Hierarchy link, a dialog is displayed listing the direct links to the parent or child projects.
Click a link on the dialog to open the given child or parent project on its Project Inventory tab. From here you can navigate the project as needed. |
|||||||||||||
|
|
Project Status |
The current status of the project that can be manually updated through the Manage Project | Edit Project menu option available on this tab. Available status types include:
For more information, see Editing the Project Definition and General Settings and Edit Project: General Tab. |
||||||||||||
|
Scan Settings |
The following fields show scan configuration details. You can edit these details on the Scan Settings tab accessed using the Manage Project | Edit Project option available on this tab. |
|||||||||||||
|
The name of the profile associated with this project. |
||||||||||||||
|
Scan Profile |
The name of the scan profile associated with this project. Click |
|||||||||||||
|
Scan Paths |
The location of your codebase. Click |
|||||||||||||
|
Scan Status |
The following fields provide information about the currently running scan, most recent scan, and historical scans. |
|||||||||||||
|
|
Scan Status |
The scan status as follows:
|
||||||||||||
|
Scan Progress |
(Available only when a scan is scheduled or is running) The progress of the scan as follows:
|
|||||||||||||
|
Last Scan |
The final status of the last scan and a statistical summary of what was scanned. The following are available scan statuses:
|
|||||||||||||
|
Past Scans |
Click the hyperlinked term here to view the scan history for the selected project. A dialog appears with a list of scans performed on the project. If a scan has not yet been performed for the project, the list will be empty. |
|||||||||||||
|
Reports |
These fields provide access to reports. If the report has been generated, the field shows the report generation timestamp and provides links to view or download the report. If the report has not been generated, select the report from the Select Report dropdown and click Generate Report. The standard Code Insight reports are described below. If custom reports have been created, they are also available on the Select Report dropdown. If a custom report requires that you select a second report for comparison purposes, a Select Project or Change button is displayed, enabling to select or change projects for the report. |
|||||||||||||
|
Project Report |
Provides status information about and access to the Project Report. This report summarizes the inventory, vulnerabilities, remaining scan evidence, and review and remediation tasks for the current project. |
|||||||||||||
|
Audit Report |
Provides status information about and access to the Audit Report. This report provides one means to distribute your research and findings to others in your organization. Only published inventory items appear in Audit reports. |
|||||||||||||
|
Notices Report |
Provides status information about and access to the Notices Report. This report is a compilation of the license (notices) content for all the open source/third-party components contained in the product. |
|||||||||||||
|
Actions |
The following buttons enable to perform functions on your project. |
|||||||||||||
|
Start Scan |
Click to start your codebase scan or rescan. If the Scan Server is disabled, this button is disabled. Optionally, to force a full codebase rescan, click the drop-down arrow to the right of this button and select Full Rescan. (This option is enabled only if a successful initial scan has been run on the project codebase.) For more information about scans and rescans, see Scanning the Codebase (for Standard Scans) and Rescanning Your Codebase. |
|||||||||||||
|
Generate Report |
Click to generate a Project, Audit, Notices, or custom report in the background. |
|||||||||||||
|
Upload Project Codebase |
Click to upload the codebase that will be scanned for the selected project. You can also use this option to overwrite the current codebase with the most recent version. If the current project is not associated with a Scan Server or the Scan Server is disabled, this button is disabled. |
|||||||||||||
|
Manage Project |
A dropdown menu that allows you to edit project settings, assign user roles for the project, export and import project data, delete a project, or change the project owner. |
|||||||||||||
 to view the details of the scan profile.
 to view the details about the Scan Server.
See Also
Editing the Project Definition and General Settings