Initiating a Codebase Rescan
Use the following procedure to rescan your codebase.
Refer to the Code Insight User Roles and Permissions section for role requirements to scan a codebase.
To start the rescan, do the following:
| 1. | Navigate to the Summary tab (see Opening the Project Summary Tab). |
| 2. | Perform either action: |
| • | Click the Start Scan button. |
| • | Click the “here” link in Scan Server Status to schedule a scan. |
If a scan is running on another project, your scan is queued and will automatically run based on queue order. If the Scan Server is temporarily inactive, the scan is also queued and will automatically start based on queue order once the server is running again. (Click the link in Past Server Scans to view details about the scheduled scan.)
Note:The current project can have only one scan scheduled or running at a time. If you attempt to schedule a rescan when your project already has a scan scheduled or running, the Start Scan button will be disabled. (The Scan Server Status will show the appropriate status.) For additional reasons for Start Scan button disablement and the actions you can take, see Actions to Take When the Start Scan Button is Disabled.
Information about the server scan’s progress is shown in the Scan Server Status section on the Summary tab.
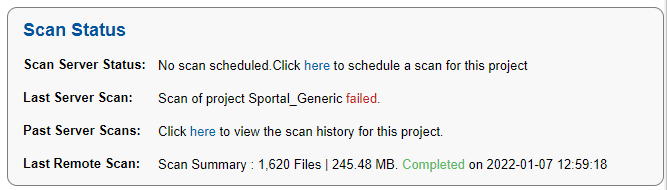
When the scan completes, Last Server Scan will display one of the following messages:
| • | Completed—The scan succeeded with no warnings during scan or analysis. This message appears on the screen in green. |
| • | Completed with warnings—The scan succeeded but the analysis produced warnings. For more information, check the scanEngineDetail log for the Scan Server. |
| • | Failed—The scan failed. This message appears on the screen in red. For more information, see Scan Failure Reasons and Troubleshooting Measures. |
For an overall understanding of the scan results, see Overview of Scan Results.