Editing Inventory from the Project Inventory Tab
Use the following steps to edit an inventory item from the Project Inventory tab for a project as needed.
To edit an inventory item from the Project Inventory tab, do the following:
|
2.
|
In the Inventory Items list, select the inventory item that you want to edit. Information about the inventory item is displayed in the right pane. |
|
3.
|
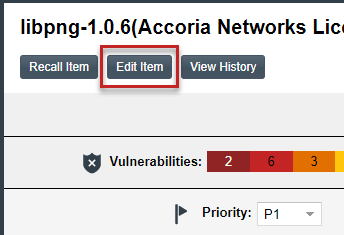
In the header on the right pane, click the Edit Item button next to the component name. |
The Edit Inventory dialog opens.
|
•
|
Using the Lookup Component feature—For a Component inventory item, you can use the Lookup Component feature to select a different registered instance (version and license) for the current component, select a different component altogether, or select a component instance for the first time (if you are changing the inventory item from a Work in Progress or License Only type). You can also use the Lookup Component feature to create a custom component instance to associate with the inventory item. Once the appropriate instance is selected, the Name, Component, and License fields on the Inventory Details tab are updated accordingly. See Using “Lookup Component” to Search for Components to Associate with Inventory for complete information. |
|
•
|
Converting to a different inventory type—To convert a Work In Progress or License Only inventory item to a different inventory type, select the appropriate option in the Type field and perform any additional steps (if any) required for the type. See Creating Inventory from the Project Inventory Tab information about the additional steps. The Name and other fields on the Inventory Details tab are updated accordingly. |
|
•
|
Quickly updating the license or version—You can quickly update only the component version or its associated license by clicking the Edit  icon next to either the Component or the License field. The Edit Version/License dialog is displayed, enabling you to select a different license, version, or both. (This procedure avoids performing the longer Lookup Component process to edit these elements.) You can also create a custom license from the dialog. icon next to either the Component or the License field. The Edit Version/License dialog is displayed, enabling you to select a different license, version, or both. (This procedure avoids performing the longer Lookup Component process to edit these elements.) You can also create a custom license from the dialog. |
If you select a new version or license (or create a new license), the Update License Mapping window can be displayed. This window provides the option to save the license mapping for the component version at the system level. If you select Yes, all future inventory system-generated for the component version will be mapped to this license. If you select No, the license mapping for the component version is updated for the current inventory item only. (For more information about the Update License Mapping window and the option to save your license mapping at the system level, see Specifying a User-Preferred License Mapping .)
|
•
|
Access to details about component versions—To help you make an informed selection of a component version, you can click the View all versions link to open the Versions for <component> window. From here, view the list of all versions for the component and, for each version, its associated licenses and security vulnerability totals (by severity). You can also delve into more detail for each associated vulnerability. If the appropriate version-license instance is not available, the window provides the option to create the missing instance. For further instructions, see Versions for <component> Window. |
|
•
|
No additional files can be associated with an inventory item from Project Inventory tab. |
|
5.
|
Click Save to change the changes to the inventory item. |