Performing an Exclusion Analysis for and Suppressing a Vulnerability for a Given Project
When you suppress a security vulnerability at the project level, you must provide an exclusion analysis for the vulnerability. Basically, this analysis describes the impact of the vulnerability on your project and any remediation performed, thus justifying (or not justifying) its suppression. Code Insight user interface helps you to provide the analysis in standard VEX (Vulnerability Exploitation eXchange) terminology. Once you complete the exclusion analysis, you have the option to suppress the vulnerability immediately. Alternatively, you can simply save whatever you have completed with the analysis, continue to update it as needed, and, if feasible, suppress the vulnerability at a later time.
The following procedure describes how to create the required exclusion analysis and suppress the vulnerability (or simply save the analysis).
To provide an exclusion analysis for and suppressing a vulnerability at the project level, do the following:
| 1. | Open the Code Insight project associated with the vulnerability for which you want to perform the exclusion analysis and/suppress. (For instructions on opening a project, see Opening a Project.) |
| 2. | In the project’s Analysis Workbench or Project Inventory tab, select the inventory item whose component version is associated with the vulnerability. (If duplicate inventory items exist for the same component version, you can select any one of the items. The analysis information and/or suppression will be applied to all duplicate inventory items in the project.) |
Note:Duplicate inventory items occur in a project when the items have the same component version but each has a different license or is identified as a “dependency of” or as related to another item.
| 3. | On the Inventory Details pane/tab for the selected inventory item, click the Vulnerabilities bar graph. |
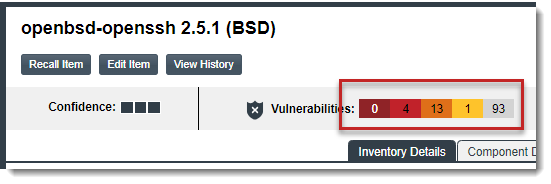
Note:The bar graph is visible only if vulnerabilities exist for the inventory item.
The Security Vulnerabilities window is displayed, listing the known vulnerabilities for the component version associated with the current inventory item (and thus associated with the project).
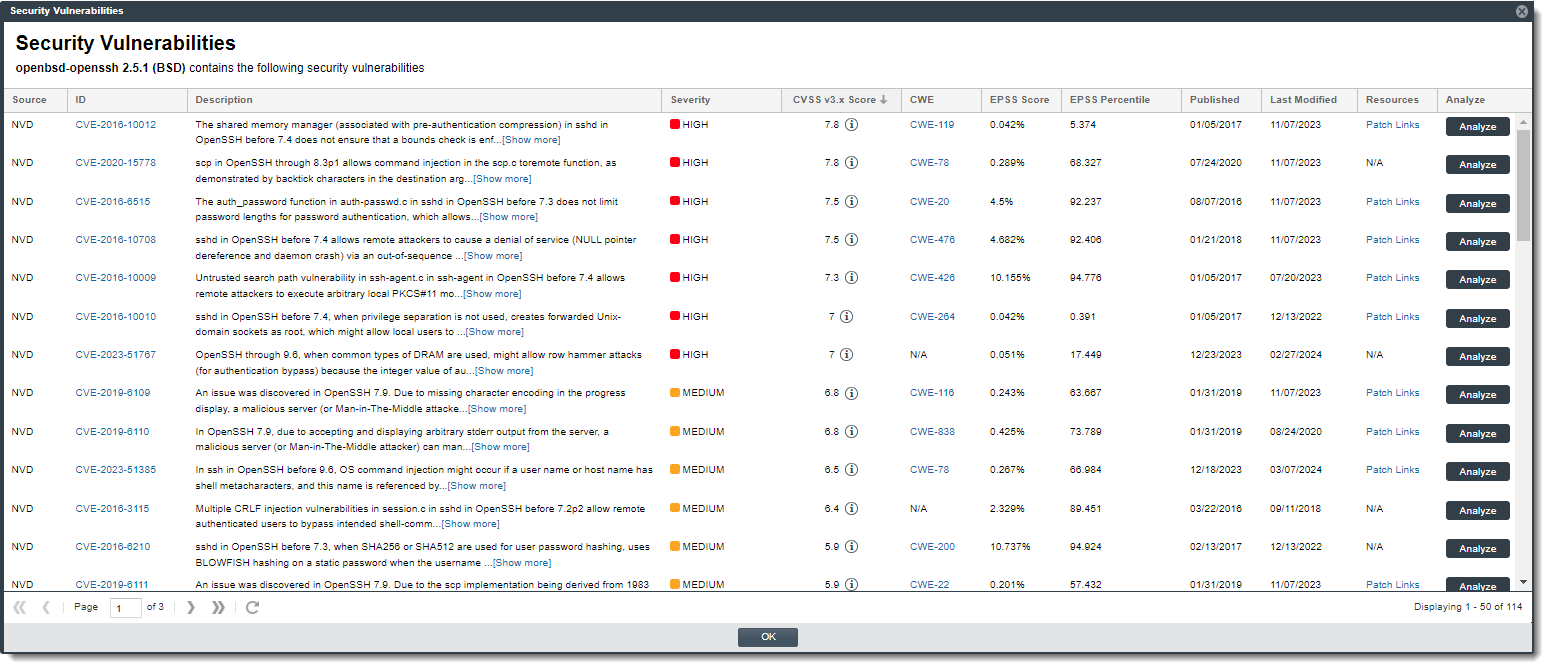
| 4. | Locate the vulnerability you want to suppress, and click its corresponding Analyze button. |
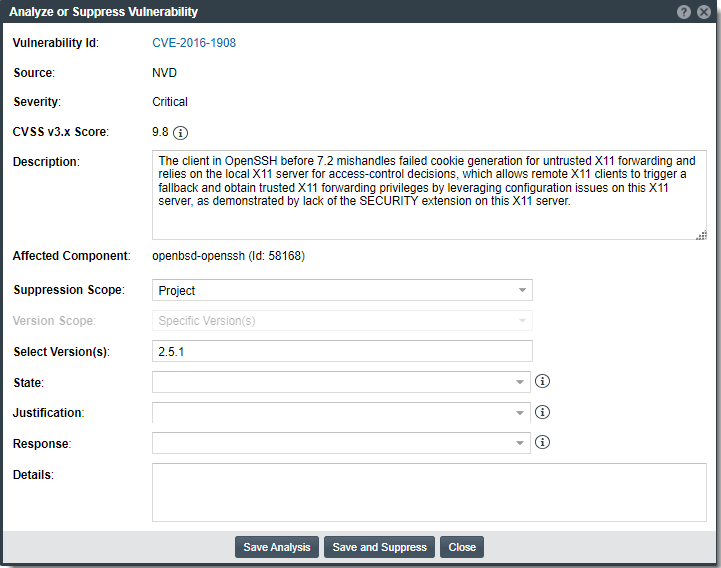
The Analyze and Suppress Vulnerability window is displayed.
Note:This window is read-only to all users except a System Administrator and the project’s Security Contact and Developer Contact. Only these three roles can perform the remaining steps to create or update the exclusion analysis for a vulnerability and suppress the vulnerability.
| 5. | (System Administrator only) Ensure that Project is selected for Suppression Scope. (By default, this field is set to Project. Only a System Administrator can edit this value.) |
| 6. | Complete the editable fields on the window to provide an exclusion analysis for the vulnerability. For a description of these fields, see Analyze or Suppress Vulnerability Window. |
| • | If you are providing the exclusion information (but not suppressing the vulnerability), you do not have to complete all fields. |
| • | If you are suppressing the vulnerability immediately, you must complete all editable fields. |
| 7. | Do one of the following: |
| • | Click the Save and Suppress button to save the current exclusion analysis and suppress the vulnerability for the current project. (All editable fields must be completed to successfully suppress the vulnerability.) |
You are returned to the Security Vulnerabilities window, which no longer lists the vulnerability you just suppressed for the project. However, if no vulnerabilities remain for the component version on the window, you are returned to the Inventory Details pane/tab. Note that count on the Vulnerabilities bar graph count is now reduced by one.
In general, the suppressed vulnerability should no longer be reflected in the project. For a description of the additional impact of suppressing a vulnerability for a project, see Effects of Suppressing a Vulnerability for a Given Project.
| • | Click the Save Analysis button to save the current exclusion analysis details but not suppress the vulnerability. Then click the Close button. (You can continue to update the analysis from this window at any time.) |
| • | Click the Close button to close the window without saving any new updates to the analysis. (If you want to save analysis updates, be sure click the Save Analysis button before closing the window.) |