FlexNet Code Insight 6.13.2
To install FlexNet Code Insight on Windows, do the following:
| 1. | Ensure that you have met all the prerequisites in Prerequisites. |
| 2. | Place the following items in the same directory, such as: C:\CodeInsight\Installer\: |
|
Type |
File |
|
Installer Jar File |
codeinsight_6.x.jar x is the latest release number of FlexNet Code Insight. |
|
Key |
codeInsight.key |
|
Database Driver |
The JDBC driver that you downloaded based on your database type. See Installing the Database Driver for details. |
| 3. | To launch the installer, double-click the codeinsight_6.13.x.jar file or enter the following at the command prompt: |
java –jar codeinsight_6.13.x.jar
The Introduction panel opens.
| 4. | Click Next. The Choose Install Set panel appears. |
| 5. | Choose one of the following installation options: |
| • | Standalone—Both core and scanner on this computer. |
| • | Core—Configure this computer as the core server. |
| • | Scanner—Configure this computer as the scan server. |
The Core Server controls your Web UI and Detector Client. The Scan Server is where actual scanning is performed.
Note • This guide addresses the Standalone install but it is also common to have a single instance of the Core Server and multiple Scan Engine Servers.
| 6. | Click Next. The Choose Install Folder panel appears. |
| 7. | Specify the FlexNet Code Insight Installation directory: |
| • | To choose an existing directory, click Choose and navigate to the directory where you want to install FlexNet Code Insight. When the directory appears, click Select and then click Next. |
Note • For Windows, the recommended location is C:\CodeInsight\<version>, which is referred to as <CODE_INSIGHT_ROOT_DIR> throughout this document.
| • | To accept the default installation directory, click Next. |
Note • To install FlexNet Code Insight on another drive, click the Choose button and enter the drive letter (such as D:\). Then press Enter, and browse to the directory on the other drive.
| 8. | Click Next. The Total System Memory panel appears. |
| 9. | Select one of the options to specify the total system memory (RAM) on this machine. |
Note • If the amount of RAM on your machine is not listed, round up or down to the closest number.
Tip • To find the RAM of your machine, select Control Panel from the Windows Start menu and select System and Security. Select View amount of RAM and processor speed from under the System heading. Note the amount of installed memory (RAM). As an alternative, open the command prompt and type systeminfo | find "Total Physical Memory" and divide the resulting number by 1024.
Note • The heap space for the Java VM will be automatically set to 80% of the total RAM amount. This is the recommended amount for running FlexNet Code Insight.
| 10. | Click Next. The Choose Database panel appears. |
| 11. | Select your database vendor. |
FlexNet Code Insight offers support for Oracle, MySQL and SQL Server database types. The input fields will be different depending on which database type you choose.
Note • You must have an empty schema and user account configured with the correct privileges before selecting the Database vendor. See the Databases section for details.
| 12. | Click Next. A Configure Database panel specific to the selected database type appears. |
Note • If you see an error indicating your database driver is missing, ensure that the database driver is in the same directory as the FlexNet Code Insight installer jar file before proceeding with the installation.
| 13. | On the Configure Database panel, enter information pertaining to your database vendor. |
Note • The IP address defaults to the IP address of the server on which you are running the Installer. You may use localhost instead of IP if the database is on this machine.
Note • The Database password will be encrypted after the first launch of the application.
| 14. | Click Next. The core.properties panel appears. |
| 15. | Enter an alias for your scan server in the Scanner Server Alias field. This is the alias you will see in the FlexNet Code Insight Web UI when you configure and launch your scans. |
| 16. | The Core/Scan Server IP Address field automatically defaults to the IP address of the machine you using to run the installer. |
| 17. | The Scan Server HTTP Port field automatically defaults to the recommended value of 8888, but may be changed as necessary. |
| 18. | Click Next. The Email Configuration panel appears |
| 19. | If you would like to receive email notifications for events such as project creation and scan completion, select the appropriate True option and specify your email settings. |
Note • Contact your network administrator to determine your SMTP settings.
| 20. | Click Next. The scan.properties panel appears. |
| 21. | In the Path to Compliance Library (CL) Directory field, enter the location of your Compliance Library. |
If your Compliance Library resides on another drive, you can manually type in the path or alternatively, press the Choose button, then enter the drive letter (such as D:\) and then browse to the directory.
Note • Your Compliance Library directory is the directory that contains a bdb folder and pattern files that end in .dat (such as C:\CodeInsight\PDL\CL\2.32).
| 22. | Click Next. The scanEngine.properties panel appears. |
| 23. | In the Path to Workspace Directory field, specify the location of your workspace directory, the directory in which your workspace data will be stored. The default and recommended location is one level above the <CODE_INSIGHT_ROOT_DIR>. |
Tip • To simplify future workspace migration, keep the workspace folder outside of your FlexNet Code Insight installation directory.
| 24. | In the Path to Scan Root Directory field, enter the path to your scan root directory. The web application uses this property to limit the root of the server file system, making it easier to control which files and directories users have access to. Multiple roots are supported, but they must be separated by a pipe character (|): |
C:\Folder1\Folder2|D:\Folder3
Note • If you do not want to limit access of FlexNet Code Insight users to files and directories, leave this field blank.
| 25. | Click Next. The Pre-Installation Summary panel appears. |
| 26. | Review your FlexNet Code Insight installation name and location. |
| 27. | Click the Install button when you are ready to proceed with the installation. The Installing panel appears. |
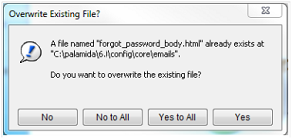
| 28. | If an Overwrite Existing File? dialog box appears, click the Yes to All button. |
Note • If you are installing into a non-empty directory, there may be files that must be overwritten. Click Yes to All to overwrite existing files.
The installer must execute a series of scripts and write to your database schema. The Initialize Database dialog appears, prompting you to specify whether you are ready to initialize the database.
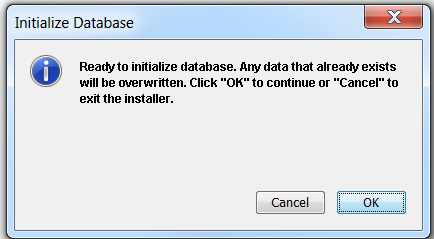
| 29. | Ensure that the database is on and that the server you are on has access to the database, and then click OK. |
Script execution messages like the following will appear:
| 30. | If you encounter a database error during the installation process, you will be notified. Correct the error and run the installer again or manually run the database scripts after the installation completes. |
Note • You may check the <CODE_INSIGHT_ROOT_DIR>/logs directory for more information about each script that was executed and for any other errors that occur during the installation process.
When the installation is complete, the Install Complete panel appears.
| 31. | Click the Done button. The installation is complete an you are now ready to launch the application. |
| 32. | Proceed with the steps in Launching FlexNet Code Insight. |
FlexNet Code Insight 6.13.2 Online Help LibraryAugust 2019 |
Copyright Information | Flexera Software |