Setting up the Jenkins Plugin
FlexNet Code Insight 6.13.2
To set up the Jenkins plugin to work with your build, perform the following steps.
To set up the Jenkins plugin, do the following:
|
1.
|
Access your Jenkins server instance. |
|
2.
|
Navigate to Manage Jenkins > Manage Plugins > Advanced tab > Upload Plugin. |
|
3.
|
Browse to the palamida.hpi file and click Upload. |
|
4.
|
Restart the Jenkins server after installing FlexNet Code Insight Scan plugin. |
|
5.
|
Create a new Jenkins project: |
|
c.
|
Select Freestyle Project. |
|
a.
|
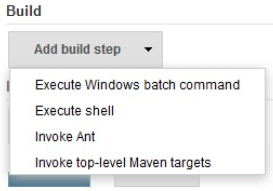
Select Add build step from the Build dropdown menu. |
|
b.
|
Select FlexNet Code Insight Scan. The FlexNet Code Insight Scan area is displayed: |

|
c.
|
Enter the following information into the FlexNet Code Insight Scan plugin config section: |
|
•
|
Server URL—Enter the URL of the scan server. Do not include /palamida in the URL. |
|
•
|
Project ID—Enter a project ID. This needs to be created ahead of time, including workspaces. |
|
•
|
Pass Jenkins git configuration—Optionally, select this option and provide Git configuration values. This can be used to perform a Git clone/sync via autorun script if desired. |
|
7.
|
To create a build task and schedule a scan of all workspaces in the referenced project, click Build Now in the left navigation bar. |
Open topic with navigation