Using Detector
Code Insight 6.14.2 SP1
To use Detector, follow the procedures in this section.
To start and use Detector, do the following:
|
1.
|
Log out and log back in as the Owner of the project. |
|
2.
|
On the Dashboard, click the name of the E-Portal 1.3 project. |
|
3.
|
Go to the Workspaces tab and click the Detector Launch icon in the Actions column. |
|
4.
|
To show automated findings, open the Groups tab, select a group (for example, Files with GNU General Public License v2.0) and double-click to view files in the tree browser. |
|
5.
|
Click Expand Folder in the lower left to display files that are contained in the selected group. |

Now you may decide to classify these files into new groups which may help organize your inventory, for example when we click one of the bold names, which indicates that this is an exact bit-for-bit MD5 match.
|
6.
|
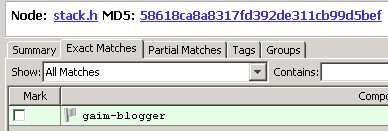
Highlight the stack.h file and in the lower center panel, and select the Exact Matches tab. |
|
7.
|
One project, Gaim-Blogger, appears. This file is an exact match to a project component in the compliance library. |
|
8.
|
Select the checkbox next to the Gaim Blogger component. The Add to Group dialog appears. |
|
9.
|
Click Create Group. Some of the fields have been auto populated. |
|
10.
|
Fill in as much of the data as you can and click Save. |
|
11.
|
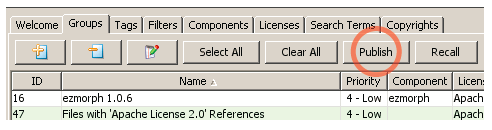
Find the group you just created in the Groups tab, select it and click Publish. |
|
12.
|
Go back to your inventory in the web interface and confirm that the Gaim Blogger group has been added as a name in the inventory. |
Note:Select the Show all option on the bottom to see all inventory items on one page. Otherwise, click through to see the pages.