Using Perforce (P4) to Manage the Codebase
Code Insight 6.14.2 SP1
To configure the current workspace to use Perforce for managing the codebase, perform the following steps.
To configure the current workspace to use Perforce, do the following:
| 1. | On the Workspace Settings – General tab, select Perforce in the Application dropdown. |
| 2. | Click on the Software Configuration Management tab, and the Software Configuration Management tab screen opens as shown below. On this screen, you can enter your Perforce configuration options. |
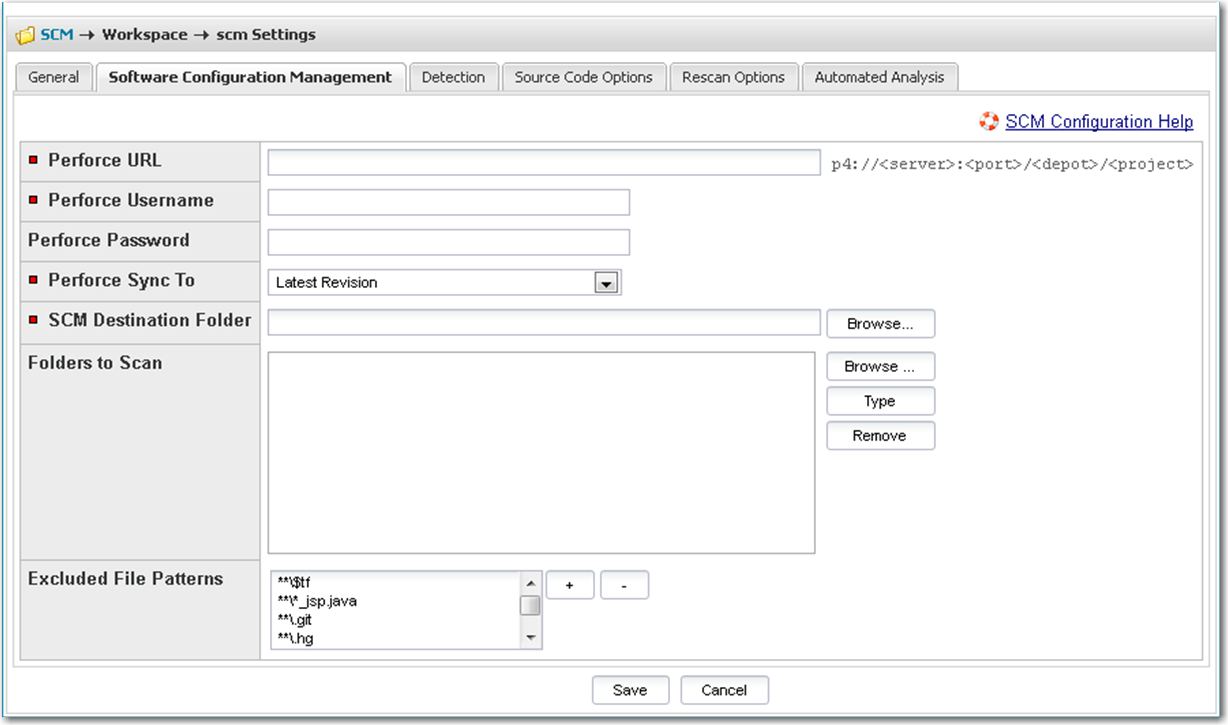
| 3. | The following options are available for Perforce: |
|
Option |
Description |
|||||||||||||||
|
Perforce URL |
Enter the repository URL in the following format: p4://<server>:<port>/<depot>/<project> |
|||||||||||||||
|
Perforce Username/Password |
Enter the username/password to create an authenticated connection to Perforce. In some cases for Perforce, anonymous access may be allowed in which case, you can leave the password field blank. |
|||||||||||||||
|
Perforce Sync To |
Select the sync to directive and provide the criteria if necessary. The following options are available:
|
|||||||||||||||
|
SCM Destination Folder |
Select the folder into which the codebase should be copied on the Scan Server. You can create new subdirectories if necessary via the browse dialog. |
|||||||||||||||
|
Folders to Scan |
Select the folders to scan within the SCM Destination Folder. You can create new subdirectories if necessary via the browse dialog. |
|||||||||||||||
|
Excluded File Patterns |
Define any file patters that are to be excluded from the scan. |
| 4. | If you wish to sync to a specific folder in a project rather than to the whole project, you may do so by creating the same folder structure as in the repository and selecting the folder as your scan path. For example: |
|
Location |
URL |
|
Perforce URL |
p4://<server>:<port>/<depot>/<project> |
|
SCM Destination Folder |
/<sync location>/ |
|
Folders to Scan |
/<sync location>/<depot>/<project>/<subdirectory>/<folder1> Note:In this case, only folder 1 will be synced and scanned. |