Viewing, Adding, or Editing a New Obligation
Code Insight 6.14.2 SP1
To view, add, or edit an obligation, do the following:
|
1.
|
Click the Research button in the Main menu bar. |
|
2.
|
Enter a license name in the Search field, and click the magnifying glass icon. |
|
3.
|
Select the license name from the list. |
|
4.
|
Click the View Obligations button to see any obligations associated with that license. |
|
5.
|
Click the Add New Obligation button to define a new license obligation, or click on the Pencil and Paper icon in the Actions column. |
|
6.
|
To add a new obligation to a license, go back to the License Edit page. |
|
7.
|
Enter the name in the Search field of a license for which you want to add a new obligation. |
|
8.
|
Click the magnifying glass icon. |
|
9.
|
Select a license from the search results, and click the plus + icon to expand the license information. |
|
10.
|
Click the Edit button at the bottom of the page. |
|
11.
|
Click the License Obligations tab. |
|
12.
|
Click the Add New Obligation icon. The License Obligation page appears. |

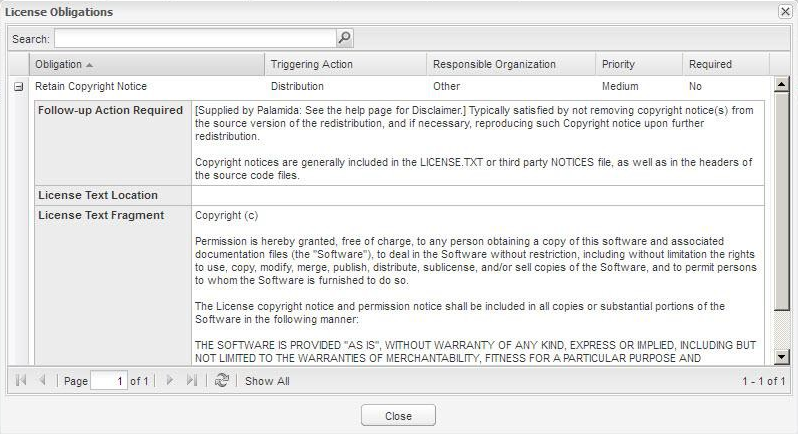
The pull-down menus on the New Obligation window can be populated using SQL scripts provided with the product. These menus allow you to specify the following:
|
•
|
Obligation: This is a list of the common types of license obligations provided via a pull-down menu. |
|
•
|
Follow Up Action: This text field allows you to enter specific information related to how users are to address the specific obligation for the current license. |
|
•
|
License Text Location: This allows you specify a path. |
|
•
|
License Text Fragments: You can cut and paste license version and text into these fields and hyperlink information. |
|
•
|
Triggering Action: This is a list of common actions that may trigger a license obligation. |
|
•
|
Responsible Organization: This is a list of organizations that typically are responsible for ensuring that required license obligations comply. |
|
•
|
Priority: Low, Medium, or High. |