Setting up the Jenkins Plugin
To set up the Jenkins plugin to work with your build, perform the following steps.
To set up the Jenkins plugin, do the following:
|
1.
|
Access your Jenkins server instance. |
|
2.
|
Navigate to Manage Jenkins > Manage Plugins > Advanced tab > Upload Plugin. |
|
3.
|
Browse to the palamida.hpi file and click Upload. |
|
4.
|
Restart the Jenkins server after installing Code Insight Scan plugin. |
|
5.
|
Create a new Jenkins project: |
|
c.
|
Select Freestyle Project. |
|
a.
|
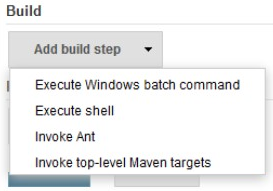
Select Add build step from the Build dropdown menu. |
|
b.
|
Select Code Insight Scan. The Code Insight Scan area is displayed: |

|
c.
|
Enter the following information into the Code Insight Scan plugin config section: |
|
•
|
Server URL—Enter the URL of the Scan Server. Do not include /palamida in the URL. |
|
•
|
Project ID—Enter a project ID. This needs to be created ahead of time, including workspaces. |
|
•
|
Pass Jenkins git configuration—Optionally, select this option and provide Git configuration values. This can be used to perform a Git clone/sync via autorun script if desired. |
|
7.
|
To create a build task and schedule a scan of all workspaces in the referenced project, click Build Now in the left navigation bar. |