Inventory Details Tab in the Analysis Workbench
The Inventory Details tab in the Analysis Workbench contains a subtab for each inventory item you have opened from the Inventory Items pane. Each subtab contains the following fields describing a given inventory item:
|
Category |
Column/Field |
Description |
|||||||||||||||||||||||||||||
|
Header information |
The Inventory Details tab header shows buttons that enable you take actions on the inventory item and lists attributes about the item and its associated component. |
||||||||||||||||||||||||||||||
|
Recall or Publish |
A toggle button that shows Publish when viewing an unpublished or recalled item or Recall when viewing the details for a published inventory item.
Upon publication, the inventory item is automatically reviewed by the review policy currently associated with the project and is either approved, rejected, or kept it in a Draft state (Not Reviewed on the Project Inventory tab). On the Project Inventory tab, users can then further review the inventory item’s security or legal issues and, if appropriate, take steps to remediate and prepare the item for inclusion in the final Third-Party Notices report for the project.
|
||||||||||||||||||||||||||||||
|
View History |
Click open the Inventory History Window, which shows a list of all updates made to the inventory item up to the current date and provides details for each update. |
||||||||||||||||||||||||||||||
|
Create Custom Rule |
(Available when inventory Type is Component) Click to open the Custom Detection Rule dialog to define an new detection rule for codebase files that are associated with a third-party component but not associated with inventory. For details, see Managing Custom Detection Rules. |
||||||||||||||||||||||||||||||
|
|
Save |
Click to save any changes you have made to the inventory details. This action can trigger an automatic review of the inventory item. See Managing Policies to Automatically Review Inventory for details. |
|||||||||||||||||||||||||||||
|
Close |
Click to close the Inventory Details pane without saving changes. You are asked to save changes before the actual closure. |
||||||||||||||||||||||||||||||
|
Review Status |
The status of the inventory item:
|
||||||||||||||||||||||||||||||
|
Alerts |
Notifies you whether or not security alerts exist for this item. If alerts exist, click the x Open Alerts or x Closed Alerts link to view their details. If no alerts exist, None is displayed. You can access the Alerts dialog from this pane to change the status or priority of an alert. For more information, see Managing Security Vulnerability Alerts. |
||||||||||||||||||||||||||||||
|
Priority |
A dropdown list showing the priority level given to this inventory item by the system, with P1 as the highest priority and P4 as the lowest. Note:During a scan, the priority for auto-published inventory is automatically assigned based on the associated license. You can change the priority for this inventory item by selecting a different priority from the dropdown list and clicking Save. For more information about priorities, see Inventory Priority. |
||||||||||||||||||||||||||||||
|
|
Vulnerabilities |
A bar graph showing the count of known vulnerabilities by severity color for the inventory item. Click the graph to view the list of vulnerabilities and their details. For details about the graph and vulnerabilities in general, see Security Vulnerabilities Associated with Inventory. The counts in this graph do not include vulnerabilities that are currently suppressed. If no vulnerabilities have been found for the inventory item, the value No is displayed in place of the graph. Additionally, if the Type value for the inventory item is Work in Progress or License Only, the value N/A is displayed. |
|||||||||||||||||||||||||||||
|
Created By |
The creator of the inventory item as either:
|
||||||||||||||||||||||||||||||
|
Confidence |
A simple three-segment graph representing the Confidence level (High, Medium, or Low) of the inventory item. The Confidence level is the measure of the strength of the discovery technique used to generate the inventory item. The graph shows three dark-shaded segments for High confidence, two for Medium, and one for Low. For more information about the Confidence levels, see Inventory Confidence. |
||||||||||||||||||||||||||||||
|
Created On |
The date and time that the inventory item was created. |
||||||||||||||||||||||||||||||
|
Updated On |
The date and time that the inventory item was updated. If the item has not been updated since its creation, the date and time shown here will be the same as the Created On date and time. |
||||||||||||||||||||||||||||||
|
Inventory details |
The following attributes describe the inventory item. You can update these attributes as needed from this pane. For a description of the inventory creation or editing process, see Creating an Inventory Item from the Analysis Workbench or Editing Inventory from the Analysis Workbench. |
||||||||||||||||||||||||||||||
|
Name |
The name of the inventory item. |
||||||||||||||||||||||||||||||
|
Type |
The type of inventory item based on the codebase files that point to evidence of a third-party or OSS component.
|
||||||||||||||||||||||||||||||
|
Component |
(Available for Component inventory types) The name of the component. Click
|
||||||||||||||||||||||||||||||
|
|
License |
(Available for Component and License Only inventory types) The name of the license associated with the component or the License Only inventory item. Click For an inventory item of the type Component, you can click If you select a new license from a group of licenses under the System Suggested License category in the License dropdown or select the license from the Other Licenses category in the dropdown, the Update License Mapping window is displayed. This window gives you the option to save the license mapping at the system level. See Specifying a User-Preferred License Mapping for complete details. |
|||||||||||||||||||||||||||||
|
Description |
A description of the inventory item. You can update the description as needed. |
||||||||||||||||||||||||||||||
|
URL |
The URL of the forge repository for this inventory item. You can update the URL as needed. |
||||||||||||||||||||||||||||||
|
purl |
The package URL for the component represented by the inventory item. This non-editable value is retrieved from the Code Insight Data Library and is applicable to a component associated with a non-custom version only. If no purl value is available in the Data Library or the version is custom, the value for this field is N/A. The use of package URLs is an attempt to standardize the way in which software packages and their locations are identified so that this information is more universal and uniform across programming languages, packaging conventions, tools, APIs, and databases. |
||||||||||||||||||||||||||||||
|
|
Provenance |
The source project from which the current inventory item was derived. Note:You cannot update this property from the Code Insight Web UI in general, but you can edit it when creating or updating inventory using the Inventory REST API. If the inventory item is not derived from another project, the value Originated in this project is displayed. However, if the inventory item is derived from another project (for example, the inventory item was imported, copied, or branched to the current project), the origin of the inventory is displayed with the inventory name and project name:
If the source project and inventory item still exist, this value is hyperlinked so that you can open the source project directly to the Project Inventory tab, with focus on the Inventory Details page for the original inventory item. The linked inventory item enables you to trace the origin of the item through its chain of predecessors. You can explore the auditing and review details of the each preceding inventory item to determine inventory history—for example, the reason the item was previously approved or rejected. If the source inventory item or its project no longer exists, the link to the previous inventory item is provided is permanently disabled (once the link in initially clicked). |
|||||||||||||||||||||||||||||
|
|
Dependency Scope |
(Not editable) The dependency scope of the inventory item:
For more information, see Dependency Scopes in the Automated Analysis section. Note:Your access to inventory of a specific scope in a project can change if a certain reconfiguration has previously occurred—for example, a change to the scan profile or a re-upload of updated runtime and non-runtime dependencies—and a rescan or full rescan has subsequently taken place. |
|||||||||||||||||||||||||||||
|
Disclosed |
The Yes or No option indicating whether the third-party component or artifact represented by the inventory item known third-party dependency in your code before it was discovered by the scan or you. This field is used most often by analysts to denote information about the state of the inventory item. |
||||||||||||||||||||||||||||||
|
|
Workflow URL |
The URL (or a text reference such as a Jira issue number) that points to the request data pertaining to this inventory item as found in your site’s external workflow system. When you view this value on the Inventory Details tab in Project Inventory, the URL displays as a link (labeled as View Associated Request), enabling the reviewer to easily access to the workflow data that tracks the status of open tasks for the inventory item. A text reference entered here is not converted to a link on the Inventory Details tab, but it still provides direction in locating the appropriate data in the workflow system. The value is None if you enter no URL or reference. Additionally, when you view the Inventory Details tab in Project Inventory, an |
|||||||||||||||||||||||||||||
|
Notices Text tab |
The Notices Text tab is used to finalize the exact content to include in the Notices report. You can edit the notices content as needed from this tab when editing an existing inventory item or creating a new one. For more information, see Finalizing the Notices Text for the Notices Report. |
||||||||||||||||||||||||||||||
|
As-Found License Text |
The As-Found License Text field shows the license text or license references found in the scanned codebase. You cannot edit this field. However, if you want to use this content in the Notices report, click Copy to Notices Text to copy the text to the Notices Text field and modify it if necessary. If content already exists in the Notices Text field, you can choose either to append the As-Found License Text content to the existing notices content or to replace the existing notices content. This field is blank if no license text or references were found in the scanned codebase. If this field contains information and the Notices Text field remains blank, the Notices report uses the content in this field. If both fields are empty, the report uses the license content from Code Insight Data Library (see License Details from the Code Insight Data Library). |
||||||||||||||||||||||||||||||
|
|
Notices Text |
The exact content to include in the Notices report. You can edit any license text previously saved to this field or manually add your own license text, such as license information for rules that you developed during your manual research on the inventory item. You can also copy the As-Found License Text content (see the previous description) to the Notices Text field and modify it as needed. As a third option, you can click the Update Notices Text button to pull a copy of the current license content from the Code Insight Data Library into the Notices Text field and modify it as needed. Or you can leave this field empty. If you provide information in this field, the Notices report pulls the content of only this field into the report. If this field is empty, the content of the As-Found License Text field is used in the report. If both fields are empty, the report uses the license content from Code Insight Data Library (see License Details from the Code Insight Data Library). For more information, see Finalizing the Notices Text for the Notices Report. |
|||||||||||||||||||||||||||||
|
Copy to Notices Text button |
(Located within the As-Found License Text field) Click this button to copy content the text in this field into the Notices Text field and modify it as necessary. If the Notices Text field already contains content, you are given the option either to append the As-Found License Text content to the existing Notices Text content or to replace all the existing Notices Text content with the As-Found License Text content. Appended text starts on a new line after the existing content in the Notices Text field. |
||||||||||||||||||||||||||||||
|
Update Notices Text button |
(Located within the Notices Text field) Click this button to copy content from the Code Insight Data Library into the Notices Text field. You can then modify the content as needed. If the Notices Text field already contains content, you asked whether to overwrite the content. If you select No, the copy operation is ended. If you select Yes, the operation proceeds. Refer to Using License Text from the Revenera Data Library in the Notices Report for the prerequisites needed to perform this copy and the types of issues you can encounter. |
||||||||||||||||||||||||||||||
|
Notes tab |
The Notes tab provides information about the automated and manual analysis of codebase as it relates to an inventory item. |
||||||||||||||||||||||||||||||
|
|
Detection Notes |
System notes that can specify the following:
|
|||||||||||||||||||||||||||||
|
Audit Notes |
Any notes added to the inventory item by the auditor or reviewer, based on findings during the analysis. You can edit these notes as needed from this pane when editing an existing inventory item or creating a new one. See Viewing or Updating Detection and Auditing Notes in the Analysis Workbench. |
||||||||||||||||||||||||||||||
|
Associated Files tab |
Click this tab to view a list of the files that are part of the inventory for this project. Each file entry shows the following:
Note:You cannot sort the file list. Optionally, you can right-click a file entry for options that enable you to perform additional operations on the file, such as marking it as reviewed, reverting its reviewed status to unreviewed, and other operations. See Managing the Codebase Files for details about these same options that are also available from the Codebase Files and File Search Results panes in the Analysis Workbench. To add associated files to this list, see Adding Files to Inventory From the Codebase List. |
||||||||||||||||||||||||||||||
|
The Copyrights and Usage tab provides copyrights and usage details for a given OSS or third-party component associated with an inventory item. You can update these information as needed from this pane when editing an existing inventory item or creating a new one. See Viewing or Editing Inventory Copyrights and Usage Information from the Analysis Workbench. |
|||||||||||||||||||||||||||||||
|
|
Copyrights |
Displays open-source or third-party copyrights associated with component versions of the inventory item and also open-source or third-party copyrights pertaining to its associated files. You can edit or remove the existing open-source or third-party copyrights, sourced from the associated files and Code Insight Data Library, in the Copyrights field for an inventory item and additionally, you can also add a new open-source or third-party copyright in the same field for the inventory item. Use the following icons, available in the Copyrights and Usage tab, to manage these copyrights in the Copyrights field:
Once you have made changes in the Copyrights field for the inventory item, click the Save button next to Create Custom Rule button (in the Inventory Details tab header). For more information, see Inventory Copyrights and Usage Information. |
|||||||||||||||||||||||||||||
|
Distribution Type |
The option indicating how you are distributing the OSS or third-party component associated with the inventory item. The distribution type can affect license priority and obligations:
|
||||||||||||||||||||||||||||||
|
(Continued) |
Part of Product |
The option indicating whether the item is part of the core product or an infrastructure piece such as a build or test tool. This can affect whether third-party notices are required for this item. The value can be Yes, No, or Unknown. |
|||||||||||||||||||||||||||||
|
Linking |
The option identifying how your software package links to the OSS or third-party component libraries. This method can affect license priority and obligations.
|
||||||||||||||||||||||||||||||
|
Modified |
The option indicating whether code from the OSS or third-party package has been modified for use by your organization. The value can be Yes, No, or Unknown. |
||||||||||||||||||||||||||||||
|
Encryption |
The option indicating whether the component provides the encryption capabilities used in the product. Encryption can affect export controls. The value can be Yes, No, or Unknown. |
||||||||||||||||||||||||||||||
|
Custom Fields tab |
The Custom Fields tab displays fields that were defined specifically for your site to provide information that standard Code Insight fields on the Inventory Details tab do not capture about the inventory.
If no custom fields have been defined, the tab displays the message “There are no custom fields configured”. Use the following guidelines for entering (or editing) a value in a custom inventory field:
|
||||||||||||||||||||||||||||||
 to view publicly available information about the component. (See
  to view additional information about the license. See
 icon will be displayed next to the URL if additional request-related details are available for the inventory item. The reviewer can then click the icon for a quick review of pertinent details about the request without having to access the workflow system.
 icon shows, enabling you to disassociate the file from the inventory item.
  to add the required open-source or third-party copyright for an inventory item.
 to remove an open-source or third-party copyright from an inventory item or its associated files.
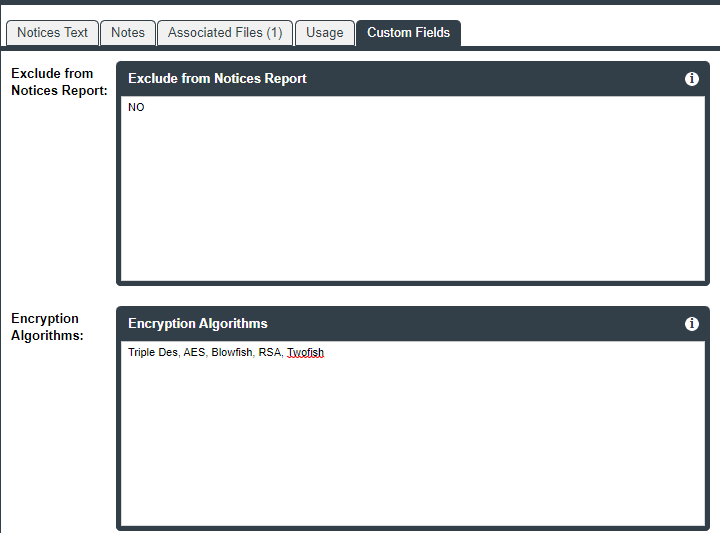
 icon in the upper right corner of a field to obtain help on completing the field.