Configuring an AI Agent Using Copilot Studio
Copilot Studio provides a low-code way to configure an AI agent to connect to Revenera MCP Server. This approach allows users to ask natural-language questions and retrieve analytics data without building custom integrations.
If you already have a Model Context Protocol (MCP) server set up, you can connect it to your AI agent.
There are two ways to connect your AI agent to an MCP server in Copilot Studio:
|
•
|
MCP Onboarding Wizard—Add the MCP server in Copilot Studio using the MCP Onboarding Wizard (recommended) |
|
•
|
Custom connector—Create a custom connector to your server via Power Apps |
To configure using the Copilot Studio, perform the following steps.
To configure access using Copilot Studio:
|
1.
|
Click Create blank agent. |

|
2.
|
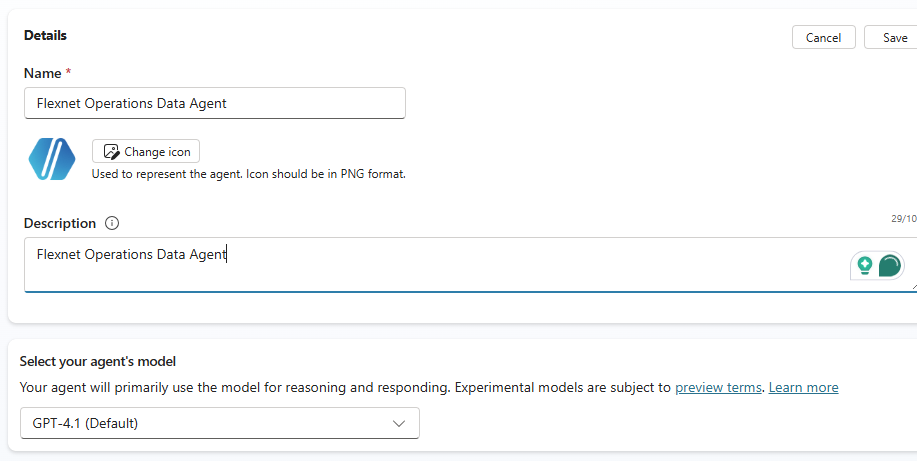
Name the agent, select an agent model, and click Save. |
|
3.
|
Open the Tools page for your agent. |
|
5.
|
Select Model Context Protocol. |
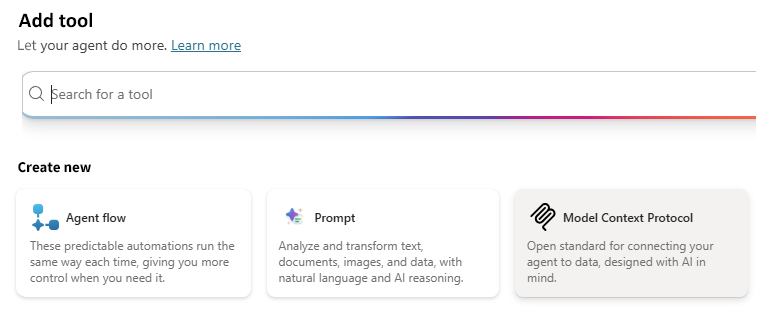
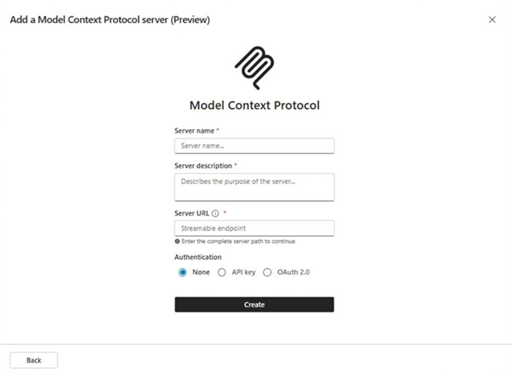
The Model Context Protocol Onboarding Wizard opens.
|
6.
|
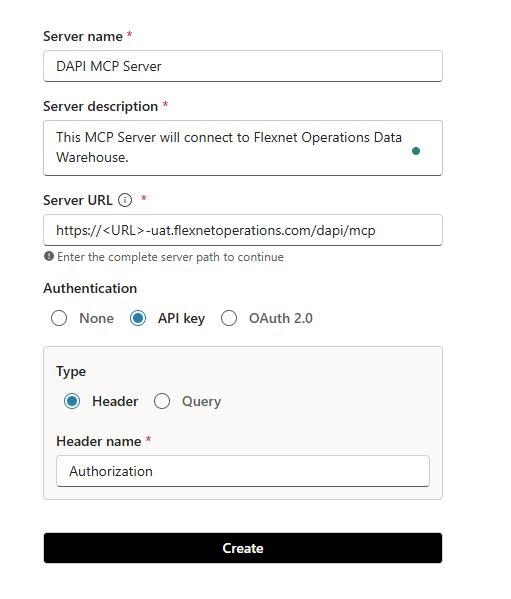
Fill in the required fields: |
|
•
|
Server name—Name to identify the server. |
|
•
|
Server description—Enter a brief but clear description of what your MCP server does. The agent orchestrator uses this information to identify whether to call your server at runtime. |
|
•
|
Server URL—URL to the server. |
|
7.
|
Select the Authentication type for your MCP server, if applicable. |
|
8.
|
If you select API key under Authentication, the Type and Header name fields are displayed: |
|
9.
|
For Type, select the type of API key to use. |
|
•
|
Header—Select this option if your MCP server requires the API key in the request header. |
|
•
|
Query—Select this option when the API key must be passed as a URL query parameter rather than an HTTP header. The key is appended to each request URL (for example, ?api_key=xxxxx) and included with every request. |
|
10.
|
In the Header name field, enter Authorization. |
Next, you need to create a connection to the MCP Server.
|
12.
|
On the MCP Server configuration screen, in the Connection field, click Not connected, and then select Create new connection. |

|
13.
|
Enter the Display name and then enter the bearer token value in this format: Bearer <Token>. |

|
14.
|
Click Create to establish the connection |
|
15.
|
After successful configuration, you should be able to view the available tools in the Agent. |
|
16.
|
The agent is ready to execute queries. |
|
17.
|
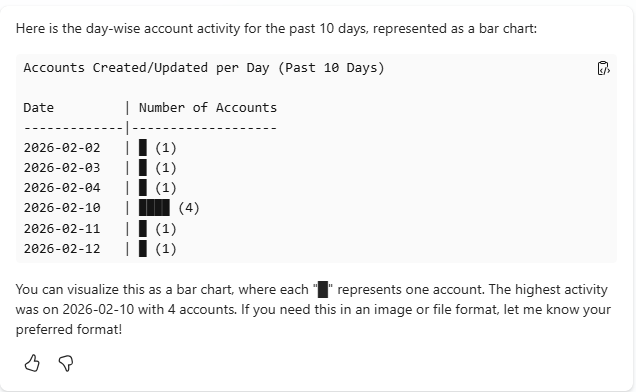
Fire an accounts report query and test the agent. |