Download and Licensing Instructions
InstallShield 2016 to 2020
Download and Licensing Instructions Home
NOTE: For instructions on accessing the Revenera Product and License Center, see Accessing the Revenera Product and License Center.
The InstallShield 2016 to 2020 downloads are available in the Flexera / Revenera Product and License Center.
- Downloading InstallShield, Add-Ons, Service Packs, and Other Installations
- Obtaining Your Activation Codes
- Licensing InstallShield, InstallShield Collaboration, and the Standalone Build
- FAQs about Downloads and Licenses
- Setting Up Your License Server for Concurrent Licenses
- Connecting Machines to Your License Server
- Borrowing InstallShield or InstallShield Collaboration Licenses from the License Server
IMPORTANT NOTE: A node-locked license is to be used by one user on one machine or virtual image, and may not be installed on shared computers. Any other use is a violation of the license agreement. Please ensure you are choosing the license that is registered to you. If you have any questions, please refer to your End User License Agreement.
IMPORTANT NOTE: If you are using a concurrent license, you must update the version of the FlexNet Licensing Server software on the licensing server before you can start using InstallShield 2018. The version of the FlexNet Licensing Server software that shipped with previous versions of InstallShield cannot manage licenses of InstallShield 2018. The new version of the FlexNet Licensing Server software can manage licenses of both InstallShield 2018 and previous releases of InstallShield. You can download the installer for the new FlexNet Licensing Server software from the Flexera / Revenera Product and License Center. For instructions on installing the FlexNet Licensing Server software, see Setting Up Your License Server for Concurrent Licenses.
IMPORTANT NOTE: Starting with InstallShield 2018, activation codes are no longer sent to customers via email. Activation codes can be obtained from the Flexera / Revenera Product and License Center, as described in Obtaining Your Activation Codes.
NOTE: As of InstallShield 2020, the Collaboration Edition (DIM Editor) is no longer available.
Downloading InstallShield, Add-Ons, Service Packs, and Other Installations
The following installations are available for download from the Flexera / Revenera Product and License Center:
- InstallShield
- Redistributable files (for example, InstallShield prerequisites and InstallScript objects)
- Add-ons (if you are entitled to them) such as the Standalone Build, InstallShield Collaboration, and the InstallShield MSI Tools
- FlexNet Licensing Server software (if you purchased concurrent licenses and you need to set up your organization's license server)
- Skin Customization Kit
- InstallScript Object templates
- InstallShield service packs (if available)
IMPORTANT NOTE: Starting with InstallShield 2018, the Collaboration Edition (DIM Editor) is no longer available.
To download any of the installations:
-
Log in to the Revenera Community, and click InstallShield on the Community home page.
NOTE: If you do not have an account in the Revenera Community, see Accessing the Revenera Product and License Center for instructions.
- On the InstallShield page, click Downloads (PLC). The Product and License Center page of the Community opens.
- Click the Let's Go button under the list containing InstallShield. The Product and License Center opens.
- In the left navigation, under Entitlements, click Product List. The Product List page shows all of the product lines to which your account is entitled. If you do not have access to multiple products, clicking the Product List link opens the Product Information page directly.
- If the Product List page shows multiple products, click the InstallShield link. The Product Information page opens.
- In the Product and File Downloads column, click the InstallShield link for the version that you want to download. The Product Download page opens.
- Click the appropriate download button.
Obtaining Your Activation Codes
Starting with InstallShield 2018, activation codes are no longer sent to customers via email. Activation codes can be obtained from the Flexera / Revenera Product and License Center by performing the following steps.
To obtain activation codes from the Flexera / Revenera Product and License Center:
- Sign in to the Flexera / Revenera Product and License Center.
- In the menu at the left, select Entitlements > Product List. The Product List page opens.
- In the Product List, click InstallShield. The Product Information page opens.
- Next to the name of the InstallShield version you purchased, click Licenses in the right-hand column. The License Information page opens, listing your activation codes.
Licensing InstallShield, InstallShield Collaboration, and the Standalone Build
The following table explains how to set up the licensing for the type of license that you purchased.
| License Type | Description of License Type | Instructions |
|---|---|---|
| Node-locked license of InstallShield or InstallShield Collaboration | This type is tied to a specific user and machine. A node-locked license requires a product activation code to activate the product. This model is the traditional option. |
To activate the product: Launch the product that you want to activate. The activation wizard opens. Use this wizard to enter your activation code. |
| Node-locked license of the Standalone Build | This type is tied to a specific user and machine. A node-locked license for the Standalone Build requires a Revenera-generated license file for the machine on which you install the Standalone Build. |
To set up a node-locked license of the product: |
| Concurrent license of InstallShield, the Standalone Build, or InstallShield Collaboration |
This type enables sharing or floating of licenses among a maximum number of simultaneous users. The product on each user's machine must be connected to a license server that your organization sets up. This license type requires you to activate the licenses on the license server using an activation code, which is available through the Flexera / Revenera Product and License Center. The license server software enables users to borrow a license for InstallShield or InstallShield Collaboration from the license server for a specified number of days. Using a borrowed license enables you to use the product while being disconnected from the same network as the license server. |
To set up the license server: See Setting Up Your License Server for Concurrent Licenses. To connect a machine that has the product to the license server: See Connecting Machines to Your License Server for InstallShield. To learn how to borrow a license of InstallShield or InstallShield Collaboration: See Borrowing InstallShield or InstallShield Collaboration Licenses from the License Server. |
FAQs about Downloads and Licenses
Following are frequently asked questions and answers about downloads and licensing for InstallShield.
Questions
Answers
General
Product and License Center
| Question | Answer |
|---|---|
| What is the Product and License Center? |
The Flexera / Revenera Product and License Center is where you perform InstallShield-related tasks such as the following:
|
| How do I create a new user account for myself in the Product and License Center? | If a user account has not been set up for you in the Product and License Center yet, you can create one for yourself, as long as you have your Account ID and Product ID. For more information, see Accessing the Revenera Product and License Center. |
| I'm having trouble downloading installations from the Product and License Center. What can I do? |
The Product and License Center offers several methods for downloading products. Examples include:
If you are having trouble using one method to download the product, you may want to try a different method. For example, if the browser FTP method does not work because your organization's firewall blocks FTP, you may want to try the HTTPS method. To change the available download options for all download links and buttons that are displayed for your user account in the Product and License Center:
To change the available download options for a specific download in the Product and License Center:
|
| How do I add users, modify users, or remove access for users in the Product and License Center? | See the Account Administrator Tasks section of the Accessing the Revenera Product and License Center instruction page. |
| How do I figure out who in my organization generated our license files? |
To look up who generated license files and see details about those license files:
|
| What Revenera technology does the Product and License Center use? |
The Product and License Center uses FlexNet Operations, an electronic software delivery service that gives software producers and high-tech manufacturers the power to cost-effectively distribute their products to customers worldwide.
For more information on FlexNet Operations, see the Revenera Web site: |
Node-Locked Licensing
| Question | Answer | ||||||||
|---|---|---|---|---|---|---|---|---|---|
| How is a node-locked license of InstallShield or InstallShield Collaboration different than a node-locked license of the Standalone Build? |
The following table highlights the main differences.
|
||||||||
| What's the best way to download my license file for the Standalone Build? | When you click the Save All button on the View Licenses page in the Product and License Center, your browser typically displays a dialog box that lets you save the license file. The options on the dialog box, as well as the behavior of this dialog box, may vary, depending on the browser and browser version that you are using. For example, Internet Explorer lets you specify the location where you want to save the file. Firefox may save the file automatically to the default download location, or enable you to open the file in an application that you select. For help on downloading files and saving them on your computer, consult the documentation of the browser that you are using. | ||||||||
| Can I run the Standalone Build installation on my development machine silently (without the user interface) for a concurrent license? |
Yes, you can run the Standalone Build silently from the command line if you purchased concurrent licenses. Use the following command-line statement:
In the above statement, the value of 2 for the LICENSETYPE property indicates that you are using a concurrent license of the Standalone Build. MyServer represents the name of the machine that has the FlexNet Licensing Server software; 1234 represents the custom port number (if one is used). In most cases, the PORTNUMBER=1234 part should be omitted from the command-line statement. |
||||||||
| If I'm using a node-locked license, can I install the Standalone Build without setting up the licensing information at the time of the installation? |
Yes, you can install the Standalone Build without specifying the licensing information during the installation. For example, if your build machine is not connected to the Internet, you may want to install the Standalone Build on your build machine; you would need to obtain the license file for your build machine on a different Internet-connected machine. Once you have obtained the license file, you can manually add it to the proper location on your build machine. The license file must be called License.lic, and it must be added to the System folder in the Standalone Build Program Files folder: Standalone Build Program Files Folder\System\License.lic |
||||||||
| Can I run the Standalone Build installation on my development machine silently (without the user interface) for a node-locked license? |
Yes, you can run the Standalone Build silently from the command line if you purchased a node-locked license. Use the following command-line statement: In the above statement, the value of 1 for the LICENSETYPE property indicates that you are using a node-locked license of the Standalone Build. The value of the IS_BROWSE_FILEBROWSED property should be the path to the license file that you want to use for the Standalone Build. |
||||||||
| What do I do if I obtain a new build machine? Can I move the Standalone Build and my license file to that machine? |
If you obtain a replacement build machine, you can move your license from your old build machine to your new build machine. In order to move your license to your new build machine, you must first return your license to your account in the Product and License Center. Returning the license makes it available again so that you can obtain a new license file for a different machine. Note that there is a limit to the number of times that you can return a license: you can return a license only one time per entitlement per year. An entitlement is the purchase of the Standalone Build (or of a product, such as InstallShield Premier Edition, that includes the Standalone Build). To return a license in the Product and License Center:
The Product and License Center processes your return request and refreshes the License Information page so that the license you returned is no longer displayed. Now you can generate a new license for the new build machine. You can also install the Standalone Build and the new license file on your new machine. |
||||||||
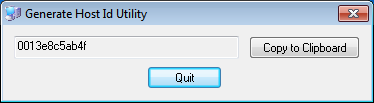
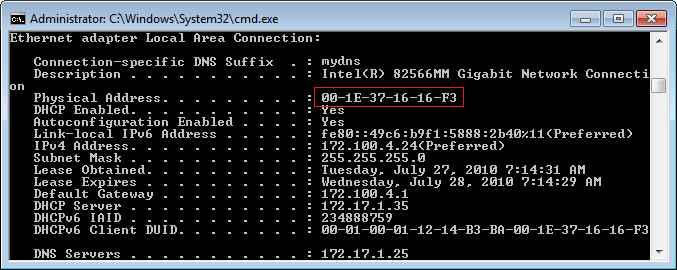
| I generated the license file for the Standalone Build but I entered the wrong host ID. How do I regenerate the correct license file? |
You can follow the same return-the-license procedure that is described in the previous question. NOTE: There is a limit to the number of times that you can return a license: you can return a license only one time per entitlement per year. |
Concurrent Licensing
| Question | Answer |
|---|---|
| What are the system requirements for the FlexNet Licensing Server? |
The FlexNet Licensing Server software manages license check-out and check-in requests from users who have concurrent licenses. If you have purchased concurrent licenses of a Revenera product, you need to install the FlexNet Licensing Server software on a machine in your environment. When you are determining which machine to use as the FlexNet Licensing Server, note the following:
|
| How do I start the FlexNet Licensing Server service? |
You can start the Windows service for the FlexNet Licensing Server by using Services in the Administrative Tools area of the Control Panel. The default name of the service is: FlexNet Licensing Server Manager (The name of the service is configurable when you are installing the FlexNet Licensing Server.) |
| How do I get reports that show usage information for my organization? |
The FlexNet Licensing Server can save a report log file that contains feature usage information. To create a report log file and view reports, you need to purchase Flexera's software license administration solution, FlexNet Manager. FlexNet Manager provides exceptional visibility into license usage data and helps you create insightful reports on critical information like license availability and usage. For more information on FlexNet Manager, see the Flexera Web site: |
| I've purchased concurrent licensing for more than one Revenera product. Can I use the same machine to manage concurrent licenses for all of these products? | Yes. You can use the same machine for managing more than one. |
| I have a FlexNet Licensing Server machine to manage concurrent licenses of an old version of a Revenera product. That machine uses lmgrd, the command-line tool. Do I need to switch to lmadmin for my new Revenera concurrent licenses? |
Yes, you must switch to lmadmin. To switch from lmgrd to lmadmin, you must first uninstall the earlier version of the FlexNet Licensing Server. Then install the latest version, which has lmadmin. You can obtain the latest version of the FlexNet Licensing Server software from the Product and License Center. For instructions on how to do this, see "Setting Up a Concurrent License Server" on page 12 of the Revenera Product Download and License Guide for InstallShield 2016 to 2020 (PDF). Note that lmgrd and lmadmin should not be installed on the same machine. |
| What do I do if I obtain a new licensing server machine? Can I move the FlexNet Licensing Server software and activate my licenses on that machine? | Yes, you can. For instructions, see "Moving Licenses to a Different License Server" on page 21 of the Revenera Product Download and License Guide for InstallShield 2016 to 2020 (PDF). |
Setting Up Your License Server for Concurrent Licenses
If your organization has purchased concurrent licenses of InstallShield, InstallShield Collaboration, or the Standalone Build, a FlexNet Licensing Server that you set up in your environment manages how many instances of the product can be run simultaneously. Each user who wants to launch one of these products needs to establish a connection with the licensing server to check out and check in licenses when needed.
The version of the FlexNet Licensing Server that is available for InstallShield 2014 and later (and for InstallShield Collaboration or the Standalone Build versions that were released with those versions of InstallShield) requires you to activate the licenses on the licensing server using an activation code, which is available through the Flexera / Revenera Product and License Center.
System Requirements for the FlexNet Licensing Server
When you are determining which machine to use as the FlexNet Licensing Server, note the following:
| Item | Description |
|---|---|
| Machine selection |
The FlexNet Licensing Server machine can be any machine in your network. Typically, the licensing server system components reside on a central machine in the network.
|
| Supported operating systems |
The FlexNet Licensing Server machine must be a Windows-based machine. The following versions of Windows are supported: Windows 7, Windows Server 2008 R2, Windows Server 2012 R2, Windows 8, Windows 8.1, and Windows 10. NOTE: Although the FlexNet Licensing Server has support for other operating systems, concurrent licensing for InstallShield 2014 and later and its ad-ons requires one of the aforementioned specific versions of Windows. |
| Networking | The FlexNet Licensing Server machine must be able to communicate with the Revenera product through a TCP/IP port. A valid number is any unused port number between 0 and 64000. The default port range is 27000 through 27009. You may need to adjust your firewall settings to allow this communication. |
| Required software |
The license server manager that is installed as part of the FlexNet Licensing Server installation is lmadmin, the Web-based application. lmgrd, the command-line tool, is not supported.
|
Setting Up the Concurrent License Server
The server installation for the FlexNet Licensing Server software is available for download from the Flexera / Revenera Product and License Center.
To download the installation for the FlexNet Licensing Server software:
-
Log in to the Revenera Community, and click InstallShield on the Community home page.
NOTE: If you do not have an account in the Revenera Community, see Accessing the Revenera Product and License Center for instructions.
- On the InstallShield page, click Downloads (PLC). The Product and License Center page of the Community opens.
- Click the Let's Go button under the list containing InstallShield. The Product and License Center opens.
- In the left navigation, under Entitlements, click Product List. The Product List page shows all of the product lines to which your account is entitled. If you do not have access to multiple products, clicking the Product List link opens the Product Information page directly.
- If the Product List page shows multiple products, click the InstallShield link. The Product Information page opens.
- In the Product and File Downloads column, click the InstallShield link for the version that you want to download. The Product Download page opens.
- Click the appropriate download button.
To set up the FlexNet Licensing Server software on the licensing server:
Install and configure the FlexNet Licensing Server software on the licensing server, and obtain the activation code. For instructions, see "Setting Up the FlexNet Licensing Server Software on the Licensing Server, Obtaining an Activation Code, and Activating" on page 14 of the Revenera Product Download and License Guide for InstallShield 2016 to 2020 (PDF).
Connecting Machines to Your License Server
If your organization has purchased concurrent licenses of InstallShield, InstallShield Collaboration, or the Standalone Build, a FlexNet Licensing Server that you set up in your environment manages how many instances of the product can be run simultaneously. Each user who wants to launch one of these products needs to establish a connection with the licensing server to check out and check in licenses when needed.
Connecting a User's Machine to the License Server for Checking Out and Checking in Licenses of InstallShield and InstallShield Collaboration
Once you or someone in your organization has set up the FlexNet Licensing Server, you need to identify the FlexNet Licensing Server that you are using on the machine where you install InstallShield or InstallShield Collaboration.
To identify the FlexNet Licensing Server for InstallShield or InstallShield Collaboration:
- Launch the product. Before the product starts, the activation wizard opens.
- Select the Configure the product to get license information from a license server option and then click the Next button. The product displays the Specify License Server dialog.
- In the Server box, enter the name or IP address of the license server, or click the Browse button to navigate to the server.
- If the FlexNet Licensing Server that was configured in your environment uses a custom port number, enter the port number in the Port box. In most cases, the port number is left blank.
- Click the Test Connection hyperlink.
The wizard connects your machine with the license server to verify whether your machine can check out and check in a license for the product.
NOTE: If you want to be able to use your new concurrent license of InstallShield on the same machine that is used to check out a concurrent license of InstallShield 2009
or InstallShield 2008, download the following update and install it on your client machine:
InstallShield 2008 and InstallShield 2009 Concurrent License Update
Connecting a Machine that Has the Standalone Build to the License Server for Checking Out and Checking In Licenses of the Standalone Build
When you install the Standalone Build, the installation prompts you to identify the FlexNet Licensing Server that will be managing concurrent licenses for the product.
To install the Standalone Build and identify the FlexNet Licensing Server that is managing your organization's concurrent licenses:
- Launch the Standalone Build installation.
- On the License Type dialog, select the Concurrent license option.
- On the License Server and Port dialog, enter the name or IP address of the licensing server. If the FlexNet Licensing Server that was configured in your environment uses a custom port number, enter the port number. In most cases, the port number is left blank. When you are done filling in the settings, click the Test Connection button to verify whether the build machine can check out and check in a license for the Standalone Build.
- Complete the remaining dialogs in the installation.
The installation installs the Standalone Build on your build machine. The installation also creates a file called Server.ini. This file is installed in the System folder in the Standalone Build Program Files folder:
Standalone Build Program Files Folder\System\server.ini
The Server.ini file should contain the following lines:
[FlexNet Publisher Server]
Server=Port@ServerName
In the above example, Port is the port number, if a custom port number is used. In most cases, the port number is omitted. ServerName is the name of the machine that has the FlexNet Licensing Server software.
NOTE: When you are installing the Standalone Build on a build machine, you can do so without specifying the license server name and port number, as long as you later manually add this information in the server.ini file in the aforementioned directory. The Standalone Build does not run without this information (or without its own node-locked license file).
Borrowing InstallShield or InstallShield Collaboration Licenses from the License Server
If you need to be disconnected from the same network as the FlexNet Licensing Server, you can (while you are connected to the same network) borrow the license of InstallShield 2014 or later, or the version of InstallShield Collaboration that ships with those versions of InstallShield, for a specified number of days. Once you have borrowed the license, you can use the product while being disconnected from the network.
Once the borrowed license has expired, the product stops working until you are connected to the same network as the license server and a license is available for check-out.
NOTE: The FlexNet Licensing Server software that ships with InstallShield 2014 and later can manage concurrent licenses for earlier versions of InstallShield; however, InstallShield 2013 was the first version of InstallShield that has support for borrowing. Thus, you can borrow licenses for InstallShield 2013 and later versions.
To borrow a license:
- While being connected to the same network as the FlexNet Licensing Server, launch InstallShield.
- On the Help menu, click About InstallShield. The About InstallShield dialog box opens.
- Click the Borrow License button. The Borrow a License Wizard opens.
-
Specify the name of the server, the license server port number, and the number of days that you want to borrow the license. The maximum number of days is 60. Then click the
Next button.
- The license is borrowed locally so that you can use the product for the specified number of days without being connected to the same network as the license server.
- If you want to return the license to your FlexNet Licensing Server before the license expires, you can do so.
To return a license before it has expired:
- While being connected to the same network as the FlexNet Licensing Server, launch InstallShield.
- On the Help menu, click About InstallShield. The About InstallShield dialog box opens.
- Click the Return License button. The license is returned to your FlexNet Licensing Server, where it is made available for you or another user to check out.