Adding a Test Product to Your Test Opportunity in Salesforce
The steps outlined in this section build on those from the previous sections. It is assumed that:
|
•
|
You have already created an opportunity called SF-TestOpportunity and are currently on the Related tab of the account page. |
|
•
|
It is assumed that you created a test product named SF-DemoProduct in FlexNet Operations and Salesforce, as described in section Creating a Test Product. If you didn’t do this, you can use any product for testing, as long as it adheres to the requirements set out in Preparing Products for Sync. |
This topic describes how to add the test product to your opportunity and change the opportunity’s state to Closed Won.
To add a test product to the test opportunity in Salesforce
|
1.
|
On the account page, under Opportunities, click the hyperlinked name of the test opportunity to navigate to it. |
|
2.
|
Locate the Products section on the right side. Click the down arrow and select Add Products. |
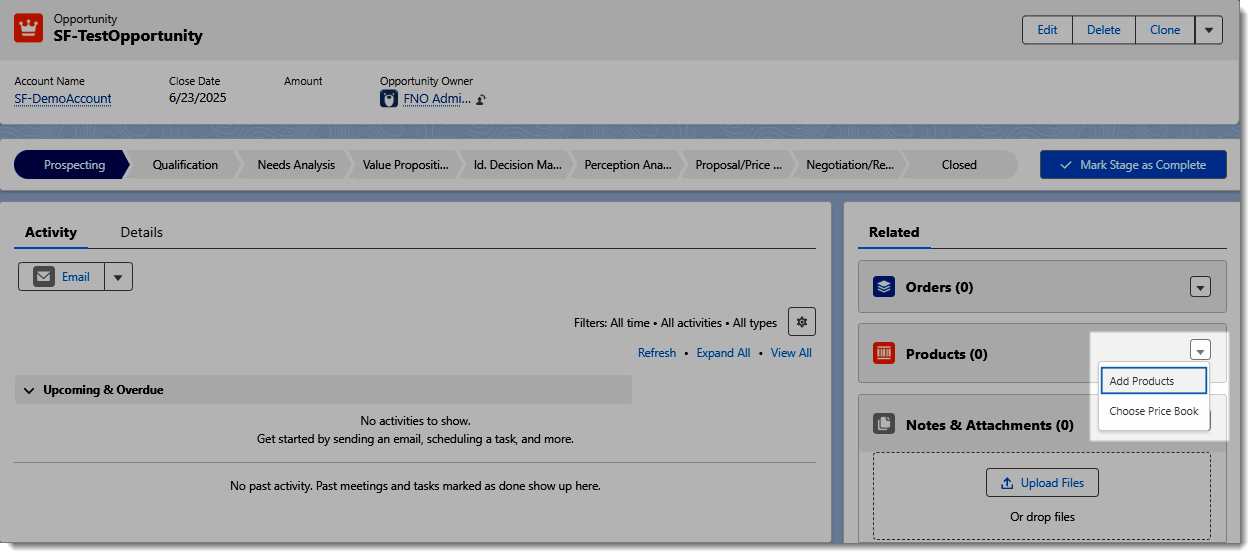
Use the Add Products button in the Products section to add a product to your opportunity.
|
3.
|
A dialog prompts you to select a price book. Select a price book and click Save. |
|
4.
|
The Add Products dialog is displayed. Select the checkbox for the test product that you prepared earlier, and click Next. |
|
5.
|
In the Edit Selected Products window, enter a quantity and click Save. |
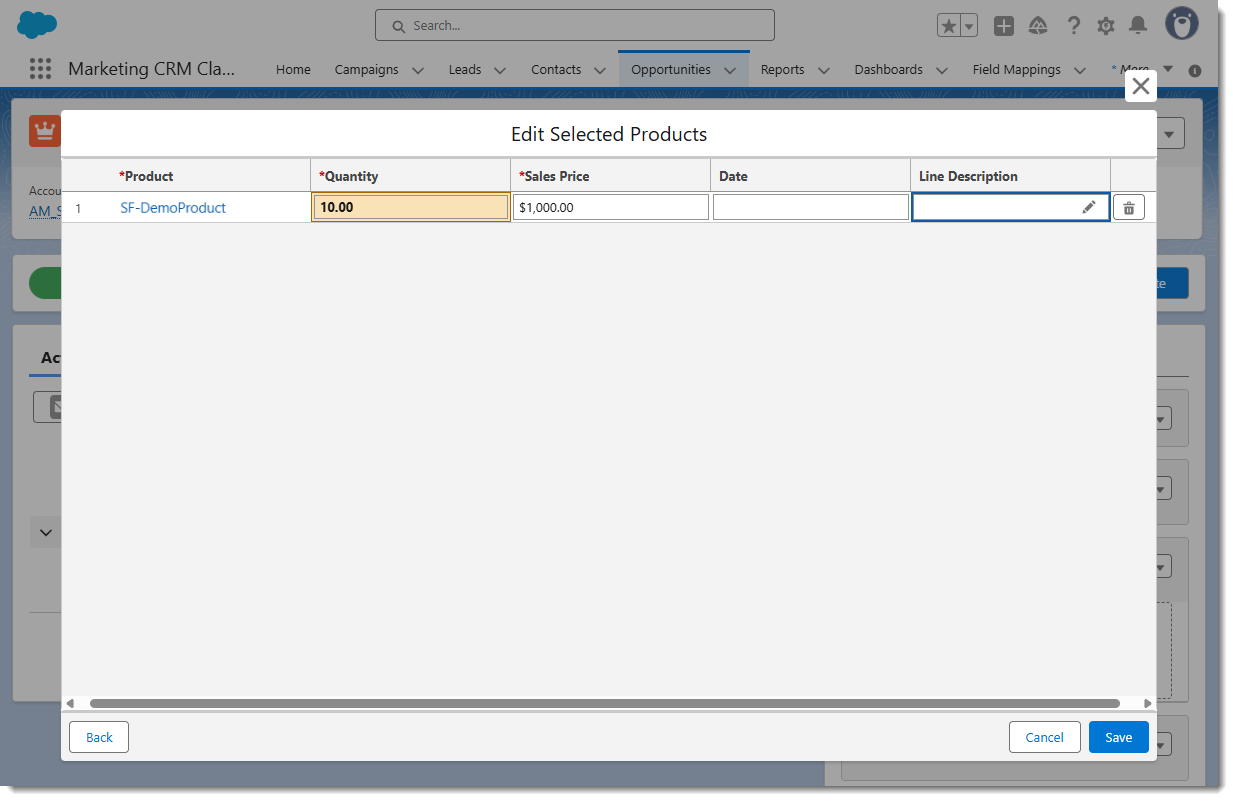
Salesforce returns to the Opportunity page, where the test product is associated with your test opportunity.
|
6.
|
On the Opportunity page, under Products, click the hyperlinked name of your test product. |
|
7.
|
Salesforce opens the Details tab for the product, which is now a line item of your test opportunity. On the tab, scroll down to the FlexNet Operations Connector Information section. |
|
8.
|
In the FlexNet Operations Connector Information section, provide a start and end date option. For this exercise, select the following: |
|
•
|
Start Date Option—Select Use First Activation Date. |
|
•
|
Start Date—Leave blank. |
|
•
|
Expiration Date Option—Select Specify Duration. |
|
•
|
Expiration Date—Leave blank. |
|
•
|
Expiration Term—Enter 1. |
|
•
|
Expiration Term Option—Select Months. |
|
•
|
Remaining Quantity and Activation ID—Do not enter anything. These fields are populated automatically after the sync with FlexNet Operations. |
Tip:For more information about the options listed above, see Providing Opportunity Product Information in Salesforce.
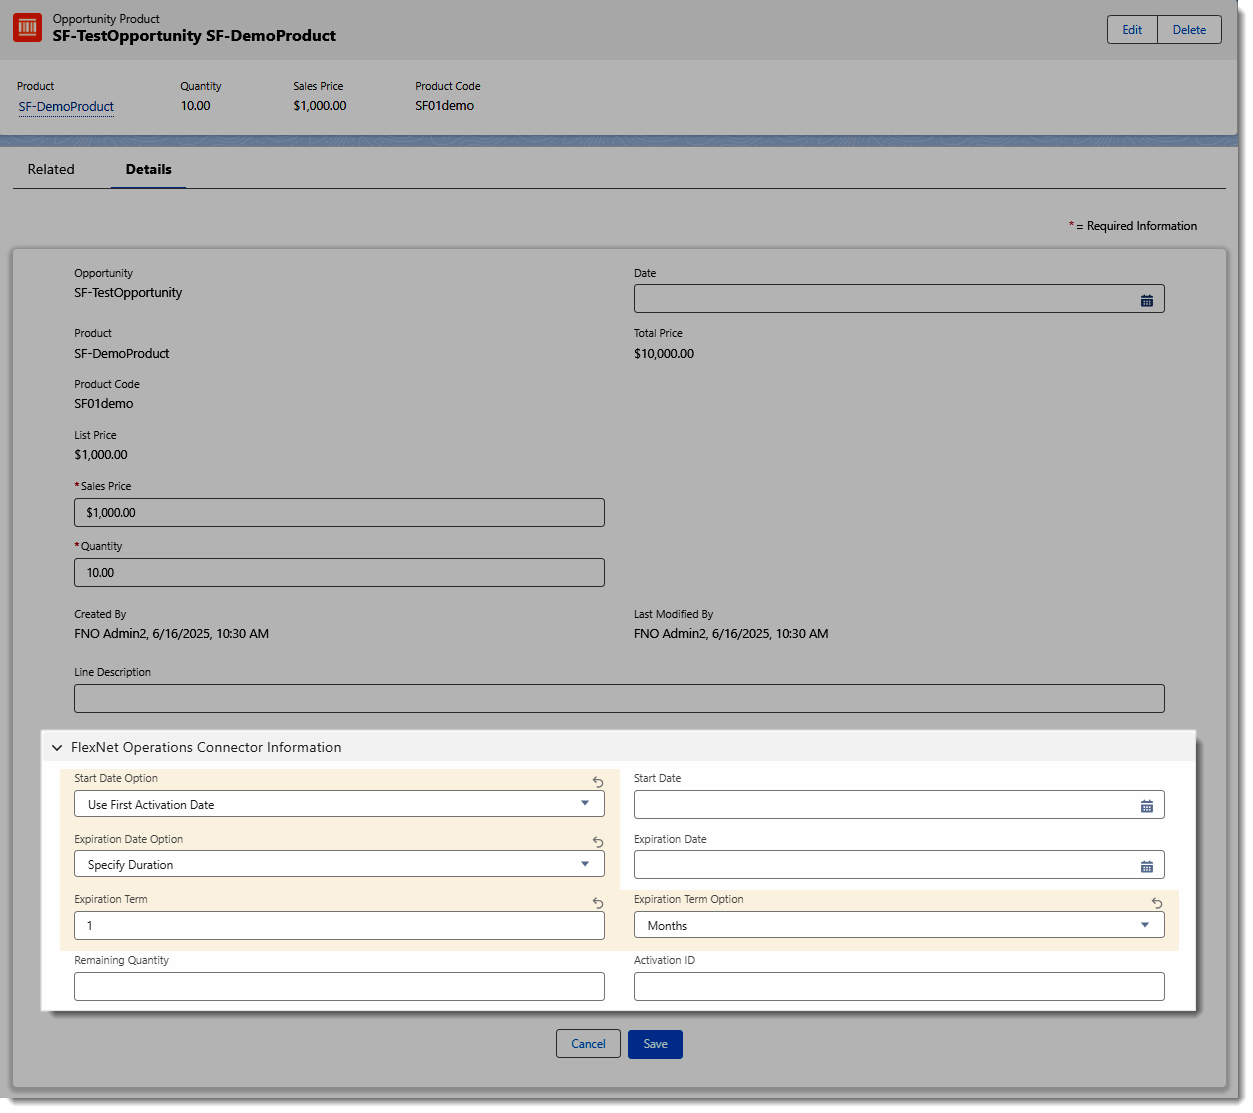
Example of FlexNet Operations Connector Information for a test opportunity line item.
|
9.
|
Click Save to save the changes made to your opportunity line item. |
|
10.
|
In the same dialog, scroll up and click the hyperlinked opportunity name to switch to the Opportunity page. |
|
11.
|
On the Opportunity page, in the Sales Path, click the last stage of the path, Closed. |
|
12.
|
Click the Select Closed Stage button to change the opportunity status to Closed Won. Click Save. |
Tip:On the opportunity page on the Details tab, scroll down to the FlexNet Operations Connector Information section and make a note of the Entitlement ID. You can use this after the sync to identify the entitlement in FlexNet Operations.
Now that the opportunity is closed, you can sync it with FlexNet Operations. Continue with the steps in the next section, Initiating a One-Off Sync.