Creating a Test Opportunity for the Test Account in Salesforce
The steps outlined in this section build upon those covered in the previous topic, Adding a Test Contact to the Test Account in Salesforce.
Note:In FlexNet Operations, the equivalent of an opportunity is an entitlement.
To create a test opportunity in Salesforce
|
1.
|
On the page of the test account that you just created, locate the Opportunities section and click New. |
|
2.
|
In the New Opportunity window, select the record type Sales and click Next. |
|
3.
|
In the New Opportunity: Sales window, in the Opportunity Information section, fill out the following fields: |
|
•
|
Opportunity Name—Enter a name, for example, SF-TestOpportunity. |
Note: In scenarios where a channel partner is involved in selling products, this field should reflect the channel partner account.
|
•
|
Close Date—Enter a date that is a few days in the future. |
|
•
|
Stage—From the dropdown list, select Prospecting. |
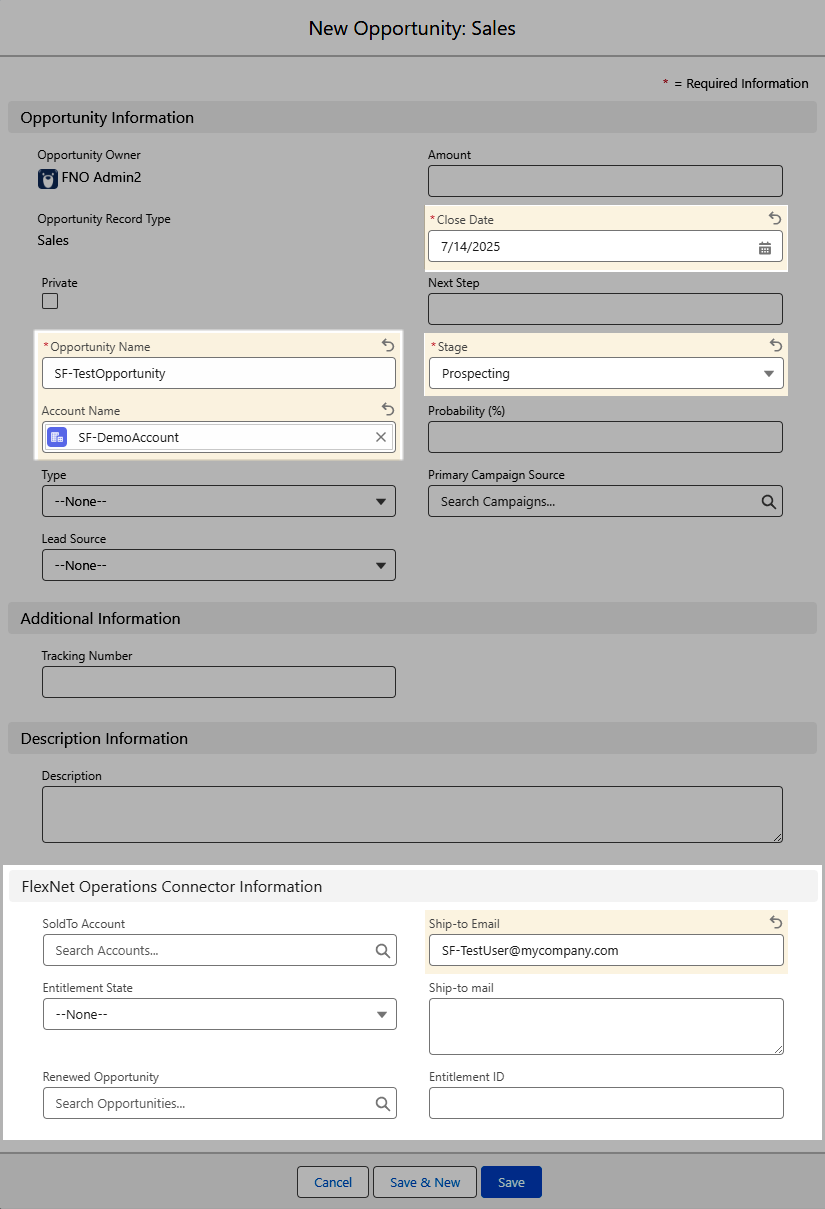
An example of the New Opportunity dialog in Salesforce, where an opportunity named SF-TestOpportunity is created.
|
4.
|
Accept the default settings for all other fields. |
Note:None of the fields in the FlexNet Operations Connector Information section are mandatory or required for this test scenario; you can leave them blank. The following is for your information only:
|
•
|
SoldTo Account—This field is used in channel partner scenarios to identify the end customer. |
|
•
|
Ship-to mail—This field is used to specify the mailing address of the contact who will receive the entitlement. |
|
•
|
Renewed Opportunity—If an opportunity has been renewed, the original opportunity name can be specified here. |
|
•
|
Entitlement ID—This field is populated automatically, by data fed back from FlexNet Operations. |
Salesforce closes the opportunity window and displays the page of the account that you created in the previous step. Continue with the next step, Adding a Test Product to Your Test Opportunity in Salesforce.